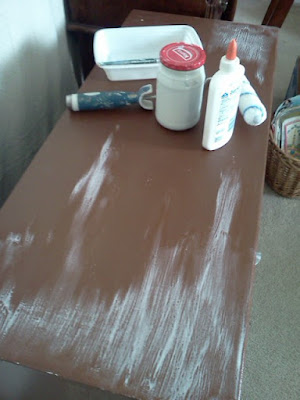
For about as long as I've been painting, whenever I've wanted an old rustic type of finish on furniture or wood I've relied on store bought crackle mediums to achieve my result. Guess what?!? I don't have any! But, with the upcoming Stashbusting September challenge I've chosen to participate in and the sheer MaSS of craft crap I've been going through... heading out to the craft store is just not an option. My ever shrinking budget will thank me for getting in the busting spirit a bit early too! I remember reading via a blog (Lord knows which one now so as to give proper credit) that you can use good old fashioned school glue to achieve the same results. Being the skeptic I am I was a bit worried but part of this whole challenge is to use what you've got...
Yes, this is the same bookself... all a part of the "don't know what I want" process! When we originally aquired it was a solid old creamy white which we painted black ( so into the black distressed movement then) and it served a purpose as an entertainment unit. Since hubby brought in another tv unit the shelf moved to the dining room. Since then it's been a bright teal (hated it) then a chocolate brown (hated it) and will now become what's in my head - a beautiful old cracked and chippy white.
Ok, so I gathered all of my supplies: white paint from the $1 bin @ HD, small 'weenie roller' as the hubs calls them, an OLD paint brush, left over Elmer's glue from last years school stash, and an old chinese take out container (to hold the paint).
The directions then suggested to wait 4-5 hours for the glue to dry. But Oh, No... Not I... I immediately started to apply the white to the wet glue. I used a heavy thick coat over the patches of glue because you cannot go back over those spots or the crackle will not work.
You can see here how the paint starts to "shrink" as it dries over the glue creating the cracks. Be very careful not to touch it until it is completely dry or the paint will lift off and shift around. I am pretty satisfied with the look I've achieved using this common household item.
Now I'm off to sand and chip up the edges a bit; perhaps add some wax to protect it. By the way, YeS, the interior shelving is still the bright teal blue... I'm doing a little something special in there but that's a suprise for next time!


1 comment:
this looks amazing! your creativity has no bounds! have to find a piece of furniture to do this with :) can't wait to see what the inside will look like!
Post a Comment